webかたつむり ウェブデザインを勉強中 ウェブ初心者のおぼえがき

webかたつむり

WEB制作会社のフォトグラファー

black and white bitmap image

helpx.adobe.com

Convert an image to Bitmap mode

Converting an image to Bitmap mode reduces the image to two colors, greatly simplifying the color information in the image and reducing its file size.

When converting a color image to Bitmap mode, first convert it to Grayscale mode. This removes the hue and saturation information from the pixels and leaves just the brightness values. However, because only a few editing options are available for Bitmap mode images, it’s usually best to edit the image in Grayscale mode and then convert it to Bitmap mode.

Note:

Images in Bitmap mode are 1 bit per channel. You must convert a 16‑ or 32‑bits-per-channel image to 8‑bit Grayscale mode before converting it to Bitmap mode.


  • Do one of the following:
    • If the image is in color, choose Image > Mode > Grayscale. Then choose Image > Mode > Bitmap.

    • If the image is grayscale, choose Image > Mode > Bitmap.

  • For Output, enter a value for the output resolution of the Bitmap mode image, and choose a unit of measurement. By default, the current image resolution appears as both the input and the output resolutions.
  • Choose one of the following bitmap conversion methods from the Use pop-up menu:

    50% Threshold


    Converts pixels with gray values above the middle gray level (128) to white and pixels with gray values below that level to black. The result is a very high-contrast, black-and-white representation of the image.


    Pattern Dither


    Converts an image by organizing the gray levels into geometric configurations of black and white dots.


    Diffusion Dither


    Converts an image by using an error-diffusion process, starting at the pixel in the upper-left corner of the image. If the pixel’s value is above middle gray (128), the pixel is changed to white—if below it, to black. Because the original pixel is rarely pure white or pure black, error is inevitably introduced. This error is transferred to surrounding pixels and diffused throughout the image, resulting in a grainy, film-like texture.


    Halftone Screen


    Simulates the appearance of halftone dots in the converted image. Enter values in the Halftone Screen dialog box:

    • For Frequency, enter a value for the screen frequency, and choose a unit of measurement. Values can range from 1.000 to 999.999 for lines per inch and from 0.400 to 400.00 for lines per centimeter. You can enter decimal values. The screen frequency specifies the ruling of the halftone screen in lines per inch (lpi). The frequency depends on the paper stock and type of press used for printing. Newspapers commonly use an 85‑line screen. Magazines use higher resolution screens, such as 133‑lpi and 150‑lpi. Check with your print shop for correct screen frequencies.

    • Enter a value for the screen angle in degrees from ‑180 to +180. The screen angle refers to the orientation of the screen. Continuous-tone and black-and-white halftone screens commonly use a 45° angle.

    • For Shape, choose the dot shape you want.


    Note:

    The halftone screen becomes part of the image. If you print the image on a halftone printer, the printer will use its own halftone screen as well as the halftone screen that is part of the image. On some printers, the result is a moiré pattern.


    Custom Pattern


    Simulates the appearance of a custom halftone screen in the converted image. Choose a pattern that lends itself to thickness variations, typically one with a variety of gray shades.

    To use this option, you first define a pattern and then screen the grayscale image to apply the texture. To cover the entire image, the pattern must be as large as the image. Otherwise, the pattern is tiled. Photoshop comes with several self-tiling patterns that can be used as halftone screen patterns.


    Note:

    To prepare a black-and-white pattern for conversion, first convert the image to grayscale and then apply the Blur More filter several times. This blurring technique creates thick lines tapering from dark gray to white.


    Photoshop convert image to bitmap mode
    Original grayscale image, and 50% Threshold conversion method

    Photoshop Pattern Dither conversion method
    Pattern Dither conversion method, and Diffusion Dither conversion method
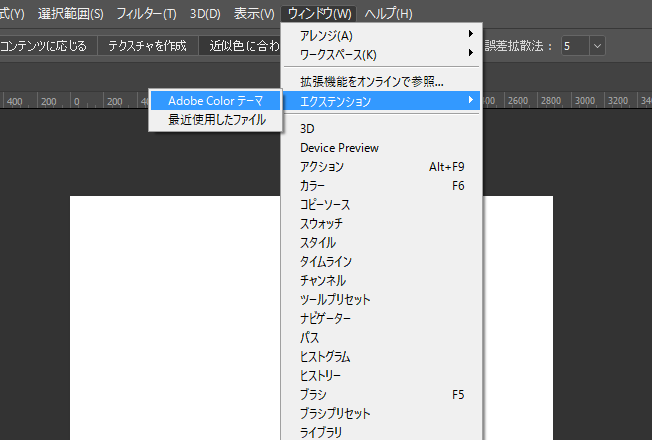
 

photoshop color theme

「ウィンドウ」「エクステンション」「adobecolorテーマ」

f:id:ohta-felica:20170617221510p:plain


下の写真で、モデルが着用しているピンクの衣装の補色を背景にしてみる。

f:id:ohta-felica:20170617222649p:plain


まず、カラーピッカーのサンプルを取得する範囲を広くする。


 ピックアップした色が、描画色(active colror)になる。


f:id:ohta-felica:20170617223443p:plain


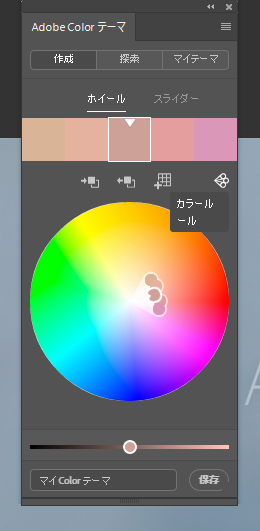
 最初に開いた「adobe color theme」ウィンドウの中段にあるアイコンをクリックする。

f:id:ohta-felica:20170617223333p:plain


adobe color themeの中に色が取り込まれました。

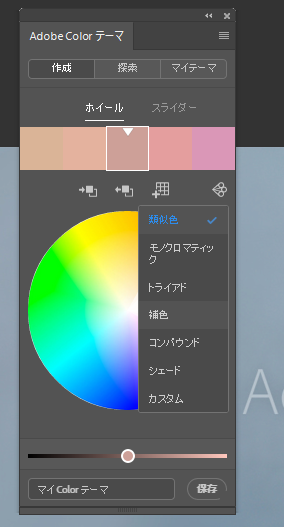
次に一番右にあるアイコンをクリックします。

f:id:ohta-felica:20170617223857p:plain


プルダウンメニューの中の「補色」を選択する。


f:id:ohta-felica:20170617224057p:plain


すると、濃度の異なる補色が2つ表示されます。


f:id:ohta-felica:20170617224236p:plain


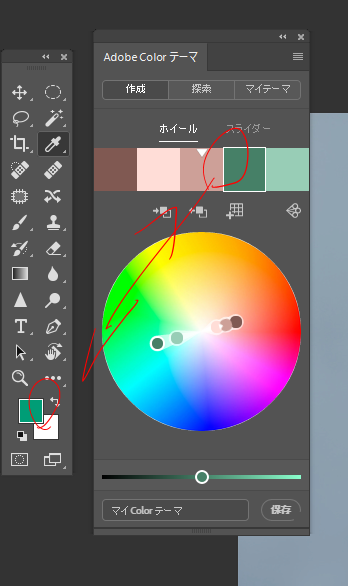
一番左側のアイコンをクリックします。


f:id:ohta-felica:20170617224353p:plain

 すると、描画色が補色に設定されます。


f:id:ohta-felica:20170617224456p:plain


あとはマスクを切って、背景のレイヤーを補色で塗りつぶせば目的を達成。


f:id:ohta-felica:20170617224936p:plain


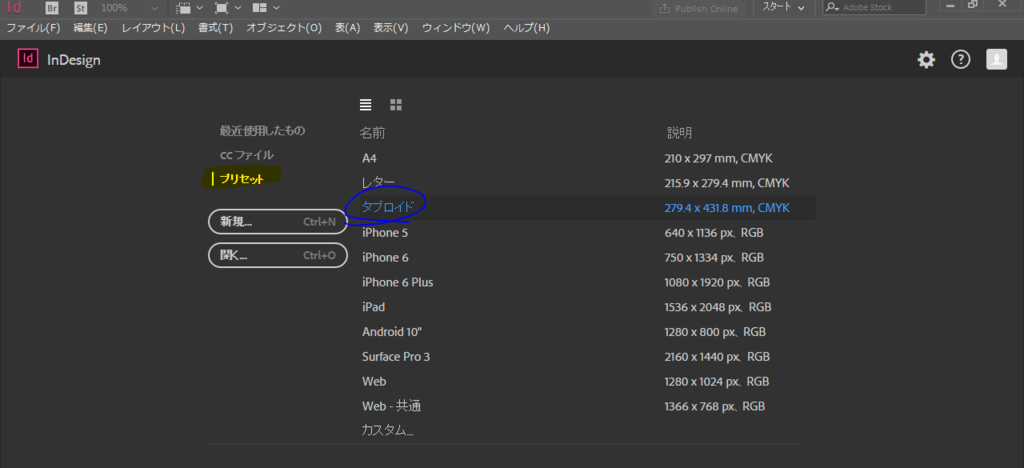
indesign tabloid
「プリセット」「タブロイド

f:id:ohta-felica:20170611074853p:plain

初期設定ではこんな表示。

f:id:ohta-felica:20170611075406p:plain


「表示」「オーバープリントプレビュー」

f:id:ohta-felica:20170611075524p:plain


プレーンな状態になる。

f:id:ohta-felica:20170611075616p:plain


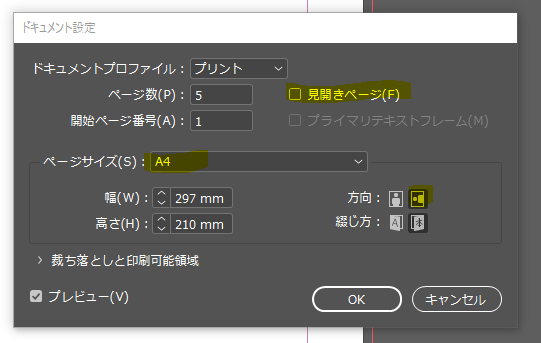
横向きにして、見開きのチェックを外す(今回はA4のプレゼン資料を作る想定)、サイズをA4に設定する。

f:id:ohta-felica:20170611083414p:plain


f:id:ohta-felica:20170611081025p:plain


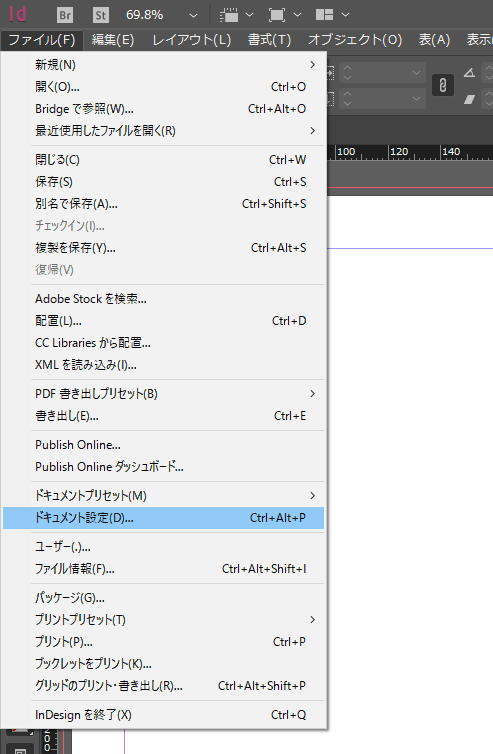
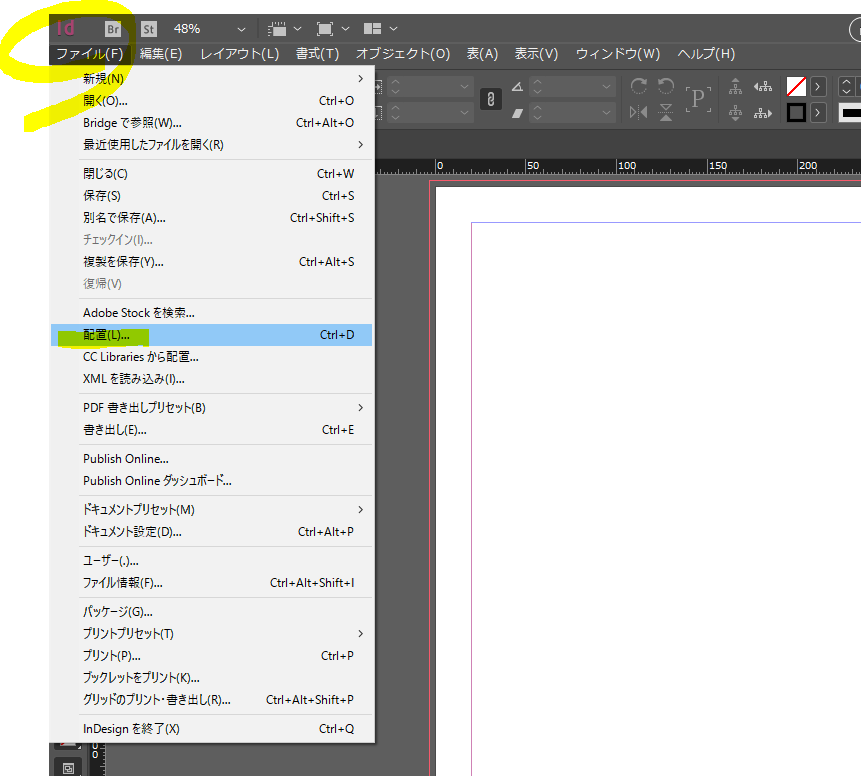
「ファイル」「配置」ショートカットは「ctlr」+「D」

f:id:ohta-felica:20170611075724p:plain

配置する写真を選択する。

f:id:ohta-felica:20170611080658p:plain


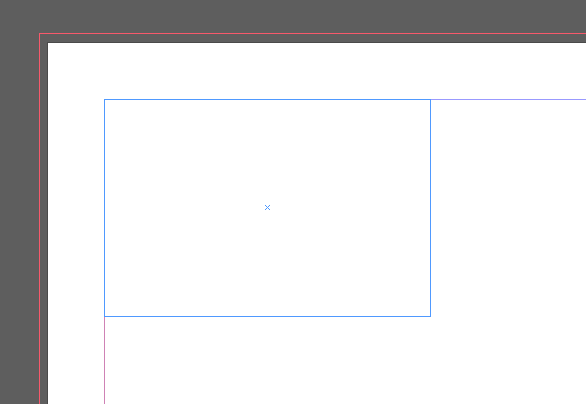
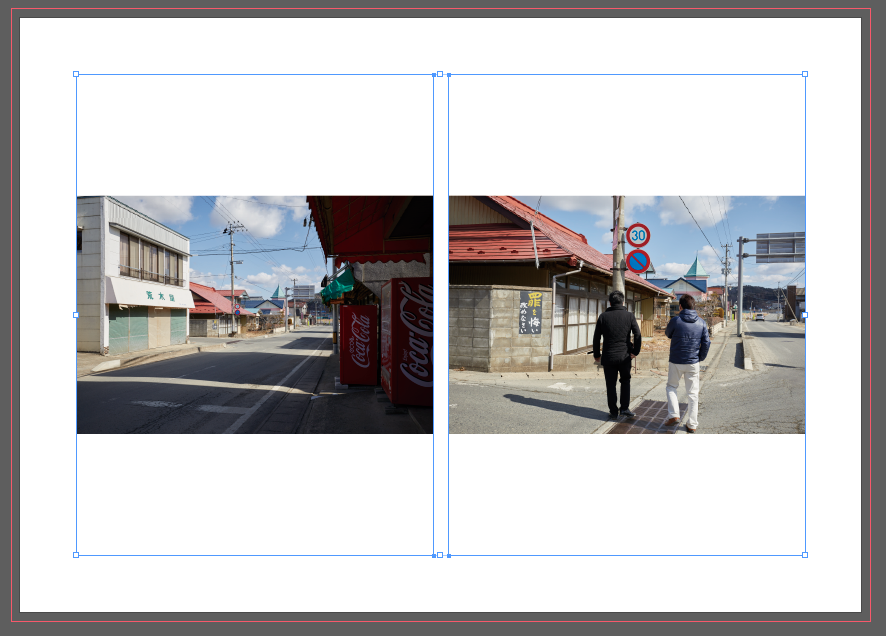
写真を割り付けたい範囲をドラッグする。 

f:id:ohta-felica:20170611082150p:plain


ドラッグしている最中に右矢印ボタンを押すと。2カラムになる。

f:id:ohta-felica:20170611082256p:plain


f:id:ohta-felica:20170611082409p:plain

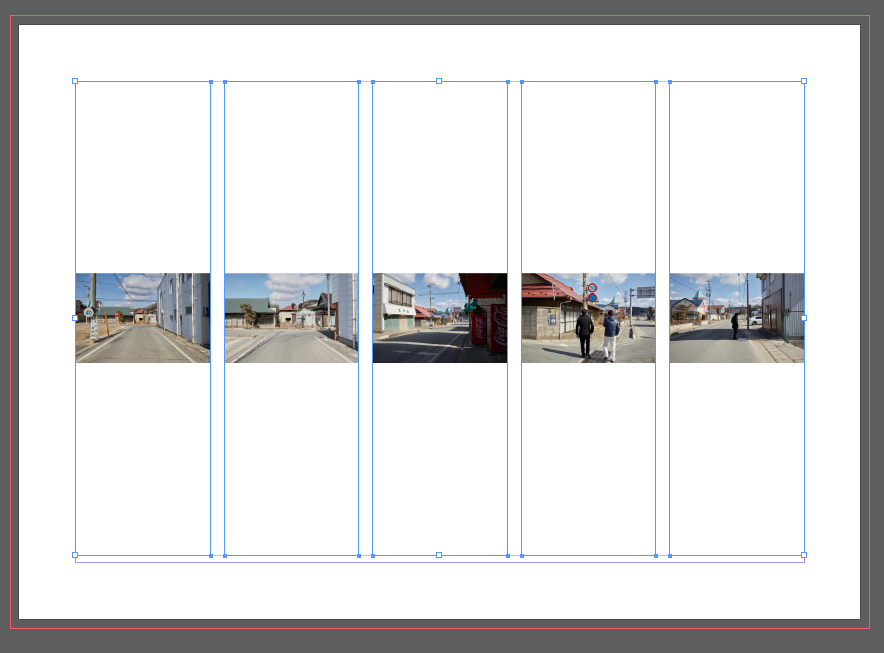
右矢印キーを5回押すと、、、5カラムになる。

f:id:ohta-felica:20170611082622p:plain


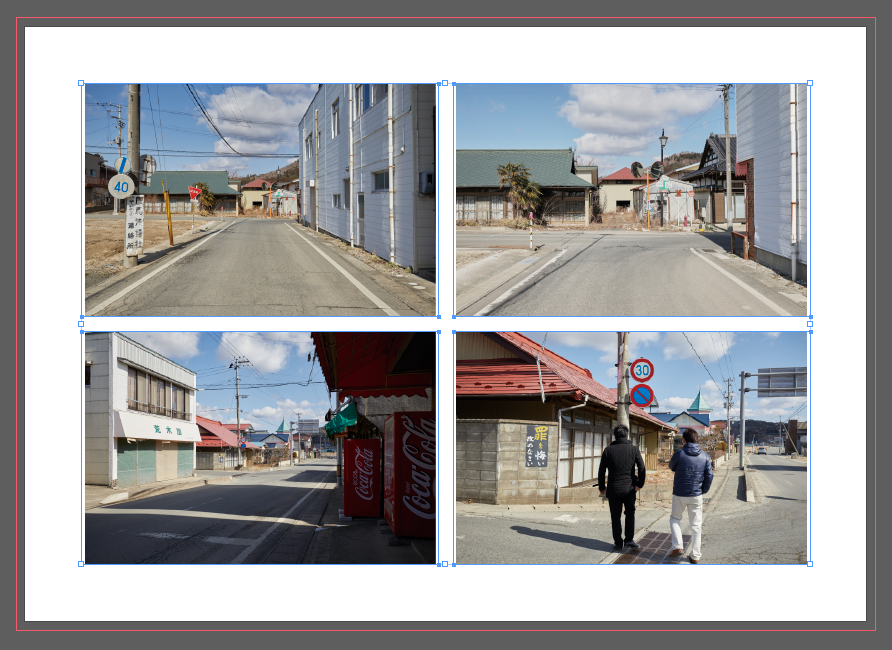
ちなみに上の矢印キーを押すと上下の分割数(この場合、行)がふえる。

「配置する写真を選択する」→「割り付けの位置をドラッグする」→

「右矢印キー」を押した回数分だけ「列」

「上矢印キー」を押した回数だけ「行」が増える。


f:id:ohta-felica:20170611082837p:plain


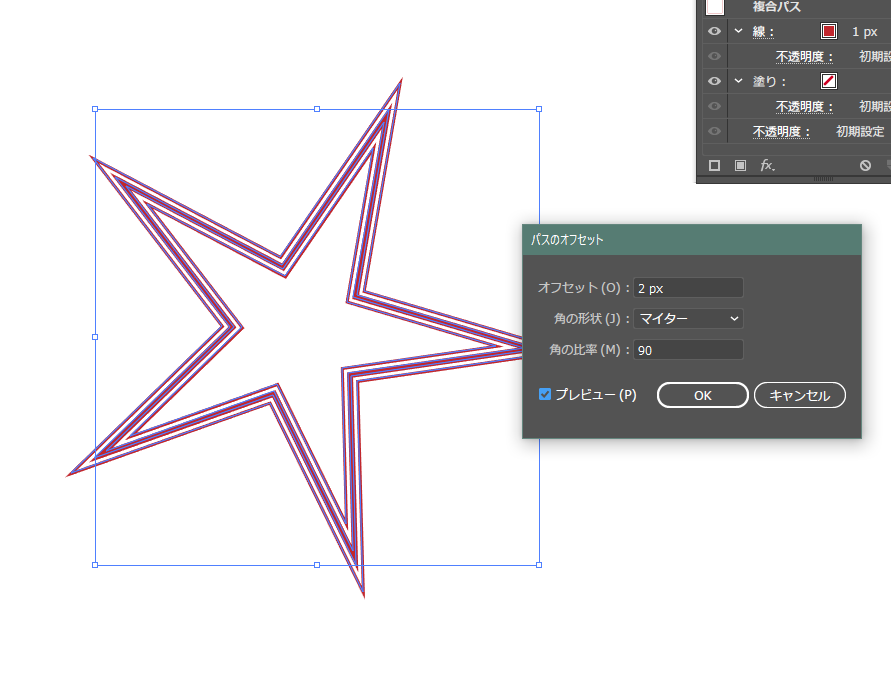
パスのオフセット

f:id:ohta-felica:20170604232011p:plain

 星の先端をベベル結合にしたくないので、比率を大きくしておきます。

f:id:ohta-felica:20170604232144p:plain

選択したパスの内側にオフセットしたいときはオフセット量を「ー」マイナスにしてあげればよい。 

これを繰り返すと、、、、

f:id:ohta-felica:20170604232609p:plain


マイター結合

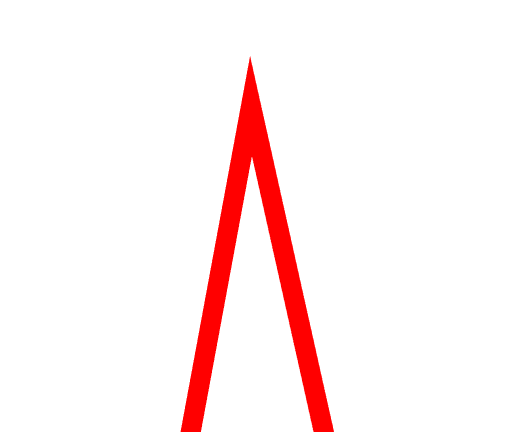
線幅10ptで鋭角を描く。

角の形状は「マイター結合」

比率は「5」

 このとき「線幅」*「比率」=50という値が重要!

この値がマイター結合の臨界点(値)になる。

マイター長が「線幅」*「比率」の値を超えることはない。

f:id:ohta-felica:20170604224439p:plain

 マイター長が値を超えたときは、ベベル結合になってしまいます。

f:id:ohta-felica:20170604224812p:plain

 上の状態から2つの線の開きを1px狭くすると、下のようになります。

f:id:ohta-felica:20170604224855p:plain

例えば袋文字を作って、、、比率の値、デフォルトでは「4」ですが、

この値を大きくします。

比率の値を大きくするということは、なかなかベベル結合にならない

=どこまでもマイター結合になります、ということ。

f:id:ohta-felica:20170604225901p:plain

 「比率」を12にしてみると尖がった角がいくつかできます。

ふたつのパスが鋭角に交わる箇所でどこまでもマイター結合するためにこのようになってしまいます。

f:id:ohta-felica:20170604230141p:plain

 逆にこのような現象が起こってしまうときは、、、

  1. 結合を「ラウンド結合」あるいは「ベベル結合」にする。この2つの結合には「比率」は関係がない。
  2. 比率の値を小さくして、尖がりが飛び出すより早く「ベベル結合」にしてしまう。

で解決ができます。

illustrator 円を中心から描く

楕円形ツールで円を描くと、外接する正方形の左上の頂点から描くことになる。

円(楕円)を中心から描きたい時は。「alt」ボタンを押したままドラッグすると中心から描くことができる。


四角形ツールでも、多角形ツールでも同様。


photoshop パスの境界線を描く

ペンツールでパスを描く

f:id:ohta-felica:20170531001711p:plain


新規でレイヤーを作る

f:id:ohta-felica:20170531000502p:plain


「ブラシ」を選択

f:id:ohta-felica:20170531000652p:plain

 「強さのシュミレート」にチェック。

こうしておくと、ペンタブレット使用時に、プレッシャーを感知してブラシの太さを変えたような表現ができる。


f:id:ohta-felica:20170531000738p:plain

 あわせて、ペンのオプションでも「サイズジッター」をオンにしておく。

f:id:ohta-felica:20170531001839p:plain


「パス」タブに移動して右クリック。

「パスの境界線を描く」をクリック。

f:id:ohta-felica:20170531000539p:plain


photoshop pentool rubberband

photoshop pentoolのオプションを設定する。

上部のオプションから「ラバーバンド」にチェックする。

f:id:ohta-felica:20170530231046p:plain


こうしておくと、曲線を描くときに、軌跡が表示されるのでどこにアンカーポイントを打てばよいかイメージしやすい。

切り抜きの時に便利。 


illustrator pentool の操作をいまひとたび復習したい

パスを書き終えるには、、、

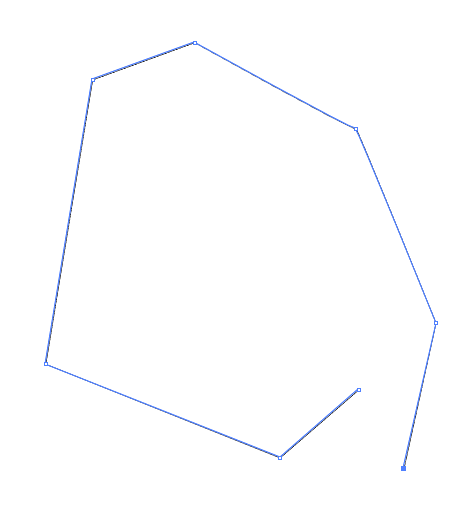
ペンツールでパスを描く。

クローズしないでやめる(書き終える)には「ctrl」を押して「ペンツール」を「ダイレクト選択ツール」にして、どこかをクリックすればよい。


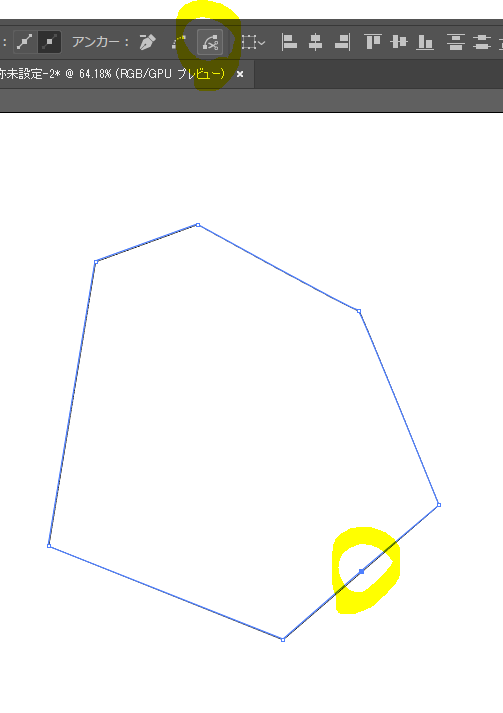
クローズドパスを途中で切る方法

切りたいパスを選択した状態で、ペンツールを持つ。(選択していないとアンカーポイントを追加するツールに自動で切り替わらない)


切りたい場所にアンカーポイントを追加する。

「ダイレクト選択ツール」で追加したアンカーポイントを選択する。

「パスを切断」ツールを選択する。

選択されているアンカーポイントをクリックアンドドラッグする。

f:id:ohta-felica:20170529222210p:plain


f:id:ohta-felica:20170529222443p:plain


jpeg converet

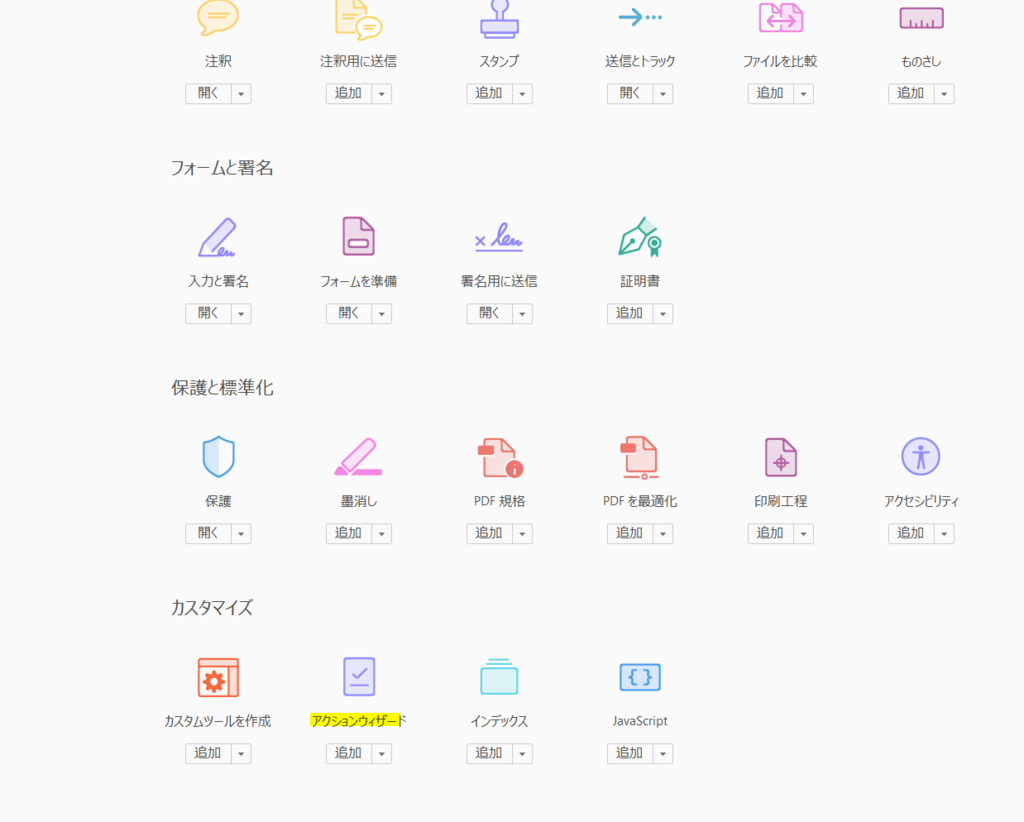
WEBカタログ製作の時など、PDFをJPEGにまとめて変換。

acrobatのactionを使用する。

「アクションウィザード」

f:id:ohta-felica:20170524125129p:plain

 「新規アクション」

f:id:ohta-felica:20170524125250p:plain

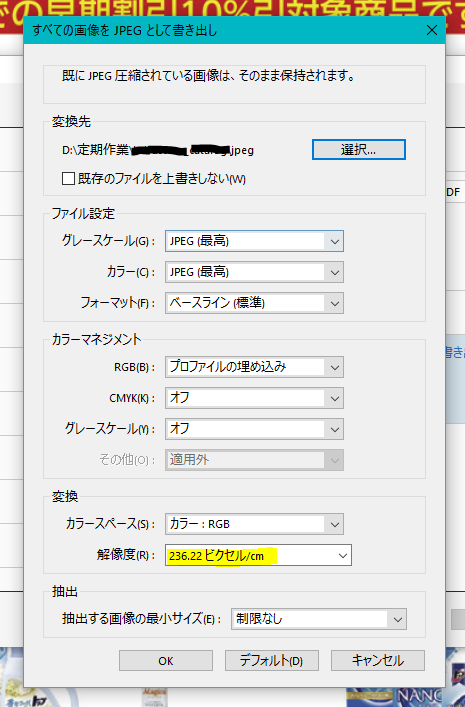
 「保存と書き出し」→「JPEG形式ですべての画像を書き出し」を選択する。

f:id:ohta-felica:20170524125842p:plain


  1. 「ユーザーに確認」のチェックを外せば自動的に同じ作業をしてくれる。
  2. 書き出しの条件を指定する。ちなみに236.22ピクセル/㎝とは600dpiのこと。
  3. 処理を施すフォルダを指定する。

f:id:ohta-felica:20170524130022p:plain


f:id:ohta-felica:20170524131341p:plain


アクションを保存する。

保存ができたらウィンドウの左側にあるアクションの一覧から実行したいアクションを選択して、実行する。


フォトショップを開いて生成されたファイルを確認するときちんと条件どおりでした。


f:id:ohta-felica:20170524131119p:plain


楽なのでおすすめです。